[toc]
使用Ubuntu手动搭建Web服务器
安装Apache2
1 | sudo apt-get install apache2 |
- 然后即可打开刘浏览器访问
127.0.0.1或Ubuntu ip地址
安装MySQL
1 | sudo apt-get install mysql-server |
- 检查是否安装成功:
1
sudo netstat -tap | grep mysql
启动Mysql失败
1 | ERROR 2002 (HY000): Can‘t connect to local MySQL server through socket ‘/tmp/mysql.sock |
- 找不到
mysql.sock文件位置 - 执行下面命令:
1
sudo cat /etc/mysql/debian.cnf
- 即可找到:
1
2
3
4
5
6
7
8
9
10
11# Automatically generated for Debian scripts. DO NOT TOUCH!
[client]
host = localhost
user = debian-sys-maint
password = QtryCctbOk7ZV2nl
socket = /var/run/mysqld/mysqld.sock
[mysql_upgrade]
host = localhost
user = debian-sys-maint
password = QtryCctbOk7ZV2nl
socket = /var/run/mysqld/mysqld.sock - 并在
my.cnf中修改1
vim /etc/my.cnf
安装PHP
1 | sudo apt-get install software-properties-common |
- 常用拓展
1 | sudo apt-get -y install php7.2-fpm php7.2-mysql php7.2-curl php7.2-json php7.2-mbstring php7.2-xml php7.2-intl php7.2-odbc php7.2-cgi |
展示PHP网页
1 | cd /var/www/html |
- ref :https://www.cnblogs.com/shenjuxian/p/13739100.html
- 配置网页1:https://www.cnblogs.com/supe/p/8010612.html
- 配置网页2:
使用PHPstudy搭建
Ubuntu安装PHPstudy
- 安装命令
1
wget -O install.sh https://download.xp.cn/install.sh && sudo bash install.sh
- 安装成功
- 实验室
1 | ==============运行状态========================= |
- 笔记本
1 | ==============运行状态========================= |
使用PHPstudy
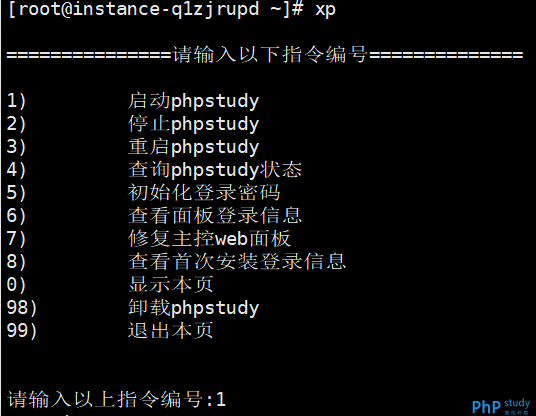
安装完成后可以在
ssh工具中使用xp命令,来查看,面板状态,重启,关闭,修改面板密码,查看面板密码等。另外如果你是专业人员,可以在ssh工具中输入
phpstudy也会显示phpstudy常用 的命令
访问所配置的域名
- 需要在所使用电脑,例如windows
(C:\Windows\System32\drivers\etc\hosts)中添加1
2#ip 域名
xxx.xx.xxx.xx www.xxx.com
内网穿透
花生壳
安装花生壳
Ubuntu版安装命令:
1
2wget "https://down.oray.com/hsk/linux/phddns_5.2.0_amd64.deb" -O phddns_5.2.0_amd64.deb
sudo dpkg -i phddns_5.2.0_amd64.deb安装成功
1
2
3
4
5
6
7+--------------------------------------------------+
| Oray PeanutHull Linux 5.2.0 |
+--------------------------------------------------+
| SN: xxxxxxxxxxxx Default password: admin |
+--------------------------------------------------+
| Remote Management Address http://b.oray.com |
+--------------------------------------------------+功能

1
phddns start(启动)| status(状态)| stop(停止)|restart(重启)| reset(重置)|enable(开机自启动)|disable(关闭开机自启动)|version(版本)**
浏览器访问http://b.oray.com ,输入花生壳Linux 5.0在安装时产生SN码与默认登录密码admin登录。
参考:11630.html
